The Keurig official troubleshooting guide explains that a keurig add water light blinking usually happens because the magnetic float inside the water reservoir is stuck or the sensor can’t detect the water level. This is a common sensor error rather than a complete machine failure. You can often fix this by cleaning the reservoir or manually resetting the float with a small magnet. If the light persists, the internal sensor may be blocked by mineral buildup, requiring a thorough descaling process to restore normal operation.
Why your Keurig add water light blinking won’t stop
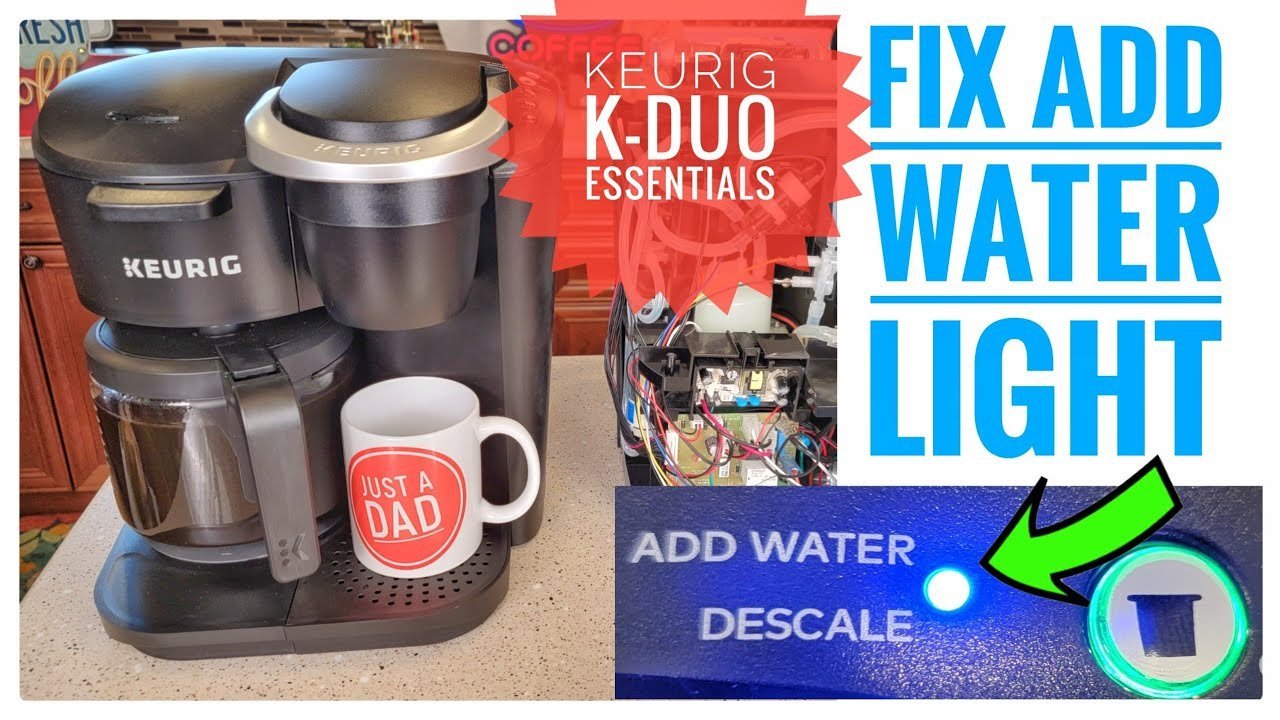
The primary cause for this blinking light is a faulty reading from the water reservoir sensor. Inside the reservoir, there’s a small, plastic-encased magnet or float that moves up and down as you add water. If this piece gets stuck at the bottom due to scale, dirt, or debris, the machine thinks the tank is empty even when it’s full. This is a safety mechanism designed to prevent the pump from running dry, which would damage the heating element.
Another cause is the accumulation of calcium and magnesium minerals, commonly known as limescale, on the sensor or the float housing. If you live in an area with hard water, these minerals build up quickly, creating a physical barrier that prevents the magnet from floating correctly.
Finally, the reservoir might not be seated perfectly on the base. If the connection points between the reservoir and the machine are misaligned, the circuit remains open, and the sensor can’t detect the presence of water. This is a common issue if the reservoir was recently removed for cleaning or refilling. Always ensure the reservoir clicks firmly into place before you attempt to brew. If the float is floating freely but the light remains, it’s time to perform a deep clean of the contact points.
Manually reset the float
If your reservoir has a visible float, this is for you. This fix is simple but requires a steady hand. First, remove the water reservoir from the machine and empty it completely. Locate the small plastic float inside the reservoir. It’s usually a cylinder-shaped piece. If it’s stuck at the bottom, use a soft brush or a cotton swab to gently nudge it upward. It should move freely without any resistance.
If the float is stuck because of dried coffee residue or scale, soak the reservoir in a mixture of warm water and mild dish soap for ten minutes. Rinse it thoroughly and use a clean cloth to wipe the area around the float. If the float still refuses to move, take a strong refrigerator magnet and move it along the outside of the reservoir wall near the float. The magnetic force can often “grab” the internal float and pull it back into the correct position.
Once the float is moving freely, fill the reservoir with fresh water and place it back onto the base. Press the brew button to see if the light has stopped blinking. If the light turns off, the sensor has successfully detected the water. If the light remains on, the issue is likely a deeper blockage within the machine’s internal intake valve, which requires a descaling process to clear.
Descale the machine
This fix is for when the sensor is blocked by internal mineral buildup. Descaling removes the layer of scale that prevents the internal pump and sensors from working. You’ll need a commercial descaling solution or a mixture of white vinegar and water. Fill the reservoir with the descaling solution, turn the machine on, and run a brew cycle without a K-Cup in the holder.
Repeat this process until the reservoir is empty. After the cycle finishes, fill the reservoir with fresh, plain water and run at least three full cycles to flush out any remaining vinegar or solution. This step is vital because leftover vinegar will affect the taste of your future coffee. If you’re using a commercial descaling solution, always follow the specific instructions on the bottle, as some brands require different dilution ratios.
How do you know if this worked? After the flushing cycles, the “Add Water” light should stop blinking, and the machine should allow you to select a brew size. If the light continues to blink, the internal sensor might be permanently damaged. This varies by model — check the label on the bottom of your machine to see if it’s still under warranty. If it is, contact the manufacturer rather than trying to open the machine yourself, as this will void your warranty.
Clean the contact points
If the float is fine, the issue might be the connection between the reservoir and the machine base. Sometimes, small debris or water spills block the metal contact pins that send the signal to the internal computer. Turn the machine off and unplug it from the wall outlet. Remove the water reservoir and set it aside.
Look at the base where the reservoir sits. You’ll see a small valve or contact points. Use a dry, lint-free cloth to wipe these areas clean. If there’s visible gunk, use a cotton swab dipped in a tiny amount of rubbing alcohol to gently clean the metal pins. Don’t use excessive liquid, as you don’t want to soak the internal electronics. Allow the area to air dry completely for at least ten minutes before you plug the machine back in.
This fix isn’t for those who are uncomfortable working near electronics. If you see any signs of rust or frayed wires, stop immediately and contact a professional repair technician. For most people, a simple wipe-down is enough to restore the electrical connection. Once the area is dry, snap the reservoir back into place and restart the machine. If the light is still blinking, it’s a sign that the internal sensor has failed and requires professional servicing.
What not to do
Don’t force the reservoir into place. Pushing too hard can snap the plastic tabs, which makes the reservoir sit loosely and causes the sensor to fail permanently. If you feel resistance, stop immediately. Check the base for debris or a misaligned gasket before trying again.
Don’t use harsh tools to pry the float. Using a knife or screwdriver can scratch the plastic casing, causing the float to leak or become permanently stuck. If the float is jammed, use a soft cotton swab dipped in warm water to gently nudge it free.
Don’t ignore the blinking light. Running the machine while the sensor is confused can cause the pump to overheat. This leads to a total mechanical failure that’s often more expensive than the repair itself.
Don’t use bleach to clean the reservoir. Bleach leaves toxic residue that enters your coffee and degrades the rubber seals, causing internal leaks. Use only mild dish soap and rinse thoroughly.
How to stop it happening again
Regular maintenance is the best way to keep your machine running smoothly and avoid sensor errors. If you use filtered water instead of tap water, you’ll significantly reduce the amount of mineral buildup that causes the float to stick.
| If you’re doing this | Do this instead | Why |
|---|---|---|
| Using tap water | Use filtered or bottled water | Reduces mineral and calcium buildup |
| Leaving water for days | Empty and rinse daily | Prevents mold and scale collection |
| Ignoring the light | Perform a descaling cycle | Clears internal blockages early |
| Using harsh soaps | Use mild dish detergent | Protects the plastic and seals |
Frequently asked questions
Can I bypass the add water light?
No, you can’t bypass the sensor because it’s a vital safety feature that protects the pump. The machine is programmed to stop brewing if it doesn’t receive a signal from the reservoir sensor. You must address the root cause of the sensor error to restore normal function.
Why is my Keurig blinking after I added water?
The magnetic float inside your reservoir is likely stuck in the down position. Mineral deposits or dried residue often prevent the magnet from rising to the sensor level. Try gently nudging the float or shaking the reservoir to free the mechanism.
How long does it take to descale a Keurig?
A full descaling cycle typically takes thirty to forty-five minutes to complete. This duration covers both the initial cleaning cycles and the necessary fresh water rinses.
Is it safe to drink water from a blinking Keurig?
Yes, the water is generally safe to drink, as the blinking light indicates a level issue rather than water quality. Accumulated scale may cause a metallic or acidic taste if the machine hasn’t been descaled recently. Always prioritize cleaning your machine if you notice unusual tastes.
What happens if I keep using my Keurig while the light blinks?
Running the machine while the light is blinking risks burning out the water pump. Operating without water generates excess heat that can melt internal components. This type of damage is usually not covered under the manufacturer’s warranty.
Final Thoughts
If your machine still won’t brew after these attempts, don’t worry. It’s likely time to reach out to Keurig’s customer service team for further assistance. They’ll help you determine if your brewer is still under warranty or if it’s time to upgrade to a newer model for your morning coffee.