
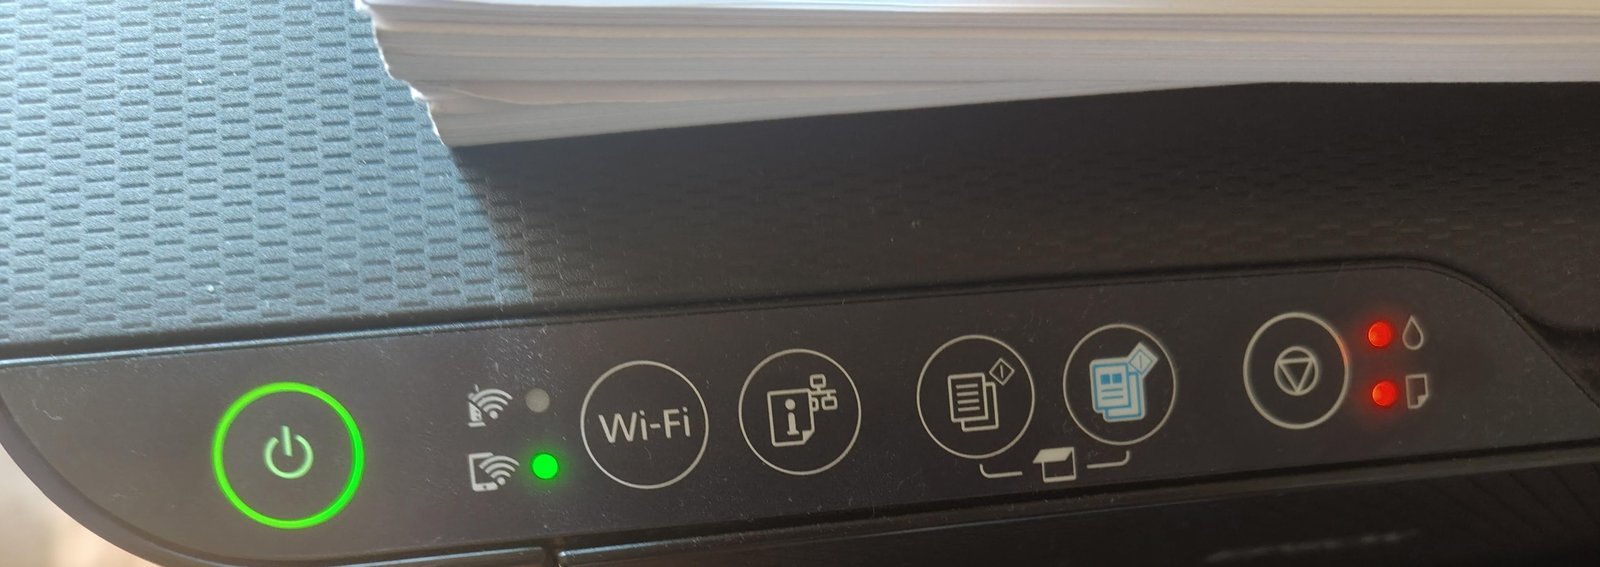
The most common cause for an Epson L320 red light blinking is an internal ink pad reaching its service life limit. This safety feature prevents ink from leaking or causing a short circuit. If your computer reports that “parts inside your printer are at the end of their service life,” the hardware has locked itself to prevent damage.
Why is my Epson L320 red light blinking?
| What you notice | What it usually means | What to do first |
|---|---|---|
| Both red lights flash | Service life ended | Check computer screen |
| Paper light flashes | Paper jam occurred | Remove all paper |
| Ink light is solid | Ink level is low | Refill ink tanks |
| Carriage doesn’t move | Obstruction inside | Unplug and inspect |
| Red light stays on | Hardware error | Contact official support |
If both red lights flash, check your screen for a specific error code. If the code mentions an “ink pad,” the printer has reached its internal page limit. You can reset this with third-party software, but doing so often leads to ink leaking inside the chassis.
When the paper light flashes but the tray appears empty, check the rear rollers for tiny scraps. A single torn corner can trigger the sensor indefinitely. If you force the tray back in, you risk snapping the plastic feed arm.
Pulling the cord during this phase risks “bricking” the mainboard, rendering the unit useless. If the light remains solid red, check the carriage path for loose staples or paper clips that prevent the print head from homing.
The internal counter is full
The printer tracks every drop of ink used during cleaning cycles and borderless printing by sending waste ink into an internal reservoir. When this reservoir reaches its capacity, the printer stops working to prevent ink spills that could ruin your furniture or damage the electrical components.
If you’re a heavy user who prints high-resolution photos, the counter will fill up much faster than if you only print occasional text documents. This is a hard limit set by the manufacturer to ensure the machine remains safe to operate.
A common mistake is attempting to bypass this warning by simply clearing the software counter without replacing the physical pads. This is a dangerous shortcut. If you reset the counter without changing the saturated pads, the printer will continue to pump ink into a reservoir that has no remaining space. This inevitably leads to ink leaking out of the bottom of the chassis and onto your desk.
If your printer displays this warning, take the device to an authorized service center. They have the tools to reset the internal counter and physically replace the saturated ink pads with new ones. Don’t use unauthorized software to reset these counters, as this often leads to permanent firmware corruption. The sign that the issue is resolved is the solid green power light returning after the technician resets the memory and replaces the pads.
Paper path obstruction
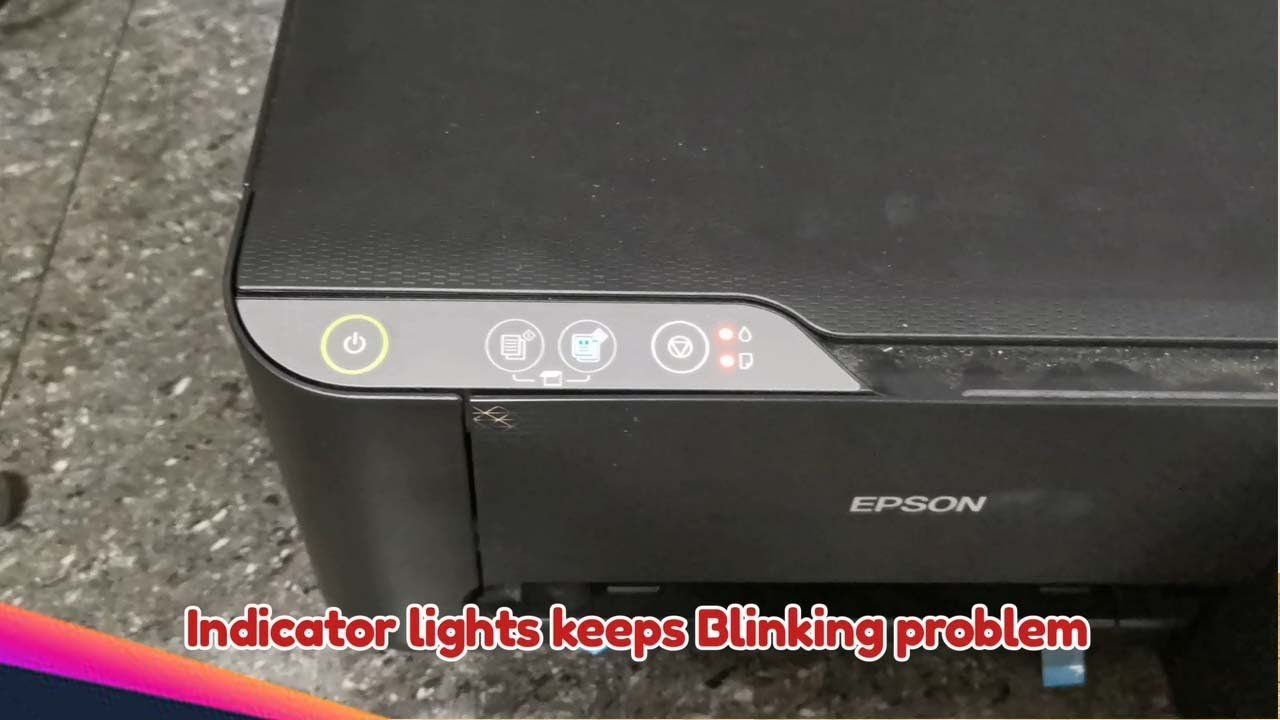
Sometimes the red lights blink because the printer can’t move the print head or the paper rollers freely. This often happens if a small scrap of paper, a staple, or a paperclip has fallen into the feed tray and jammed the internal gears. To check this, turn the printer off and gently open the scanner unit to look for debris. If you see something, use tweezers to pull it out slowly; if you pull too fast, you might break the delicate plastic clips that hold the rollers in place.
If you don’t see any debris, the print head might be stuck because of dried ink or a loose ribbon cable. You should never force the print head to move by hand, as this can snap the timing belt. You can tell this apart from the ink pad issue because a paper jam usually prevents the printer from even attempting to load a page, whereas an ink pad error stops the printer from starting any task at all. When you clear a jam, the printer will usually resume its normal cycle once you press the paper feed button.
Firmware communication failure
The system occasionally enters an error state if the connection between your computer and the printer is interrupted during a background firmware update. This usually happens if the USB cable is moved or the power flickers while the printer is writing data to its internal memory. To fix this, disconnect the USB cable from both the printer and the computer, unplug the power cord for at least sixty seconds, and then reconnect everything directly to a wall outlet.
Avoid using USB hubs or extension cables, as these often cause signal drops that lead to these types of communication errors. If the printer boots up with a steady power light after this reset, the issue was likely a temporary data handshake problem. You can distinguish this from the other two issues because the printer may not even be recognized by your computer as “online” in the printer settings menu. If the red light returns immediately after a hard reset, the firmware may be corrupted beyond a simple power cycle fix. This varies by model—check the label on the back of your machine to ensure you’re downloading the correct firmware version if you ever perform an update, as installing the wrong file will cause a permanent hardware error.
When to stop and get help
Ink leakage: If you see any black or colored fluid pooling under the printer, stop using it immediately as this is a fire and shock hazard. Unplug the unit and place it on a plastic tray to prevent permanent damage to your flooring or desk surfaces.
Burning smell: If the unit emits an electrical burning odor, unplug it from the wall and don’t turn it on again. A persistent ozone or plastic scent indicates a short circuit in the power supply. Don’t attempt to reset the printer, as this can trigger a secondary surge.
Broken internal parts: If you hear grinding or snapping noises, the internal gears are damaged and require a professional technician to replace. Continuing to run a machine with misaligned gears often strips the plastic teeth, turning a simple alignment fix into a total mechanical failure.
Warranty status: If your unit is less than one year old, don’t open the internal casing, as this will void your manufacturer’s warranty. Attempting to repair internal mechanical components without specialized training often results in permanent damage to the print head, which is the most expensive part of the machine.
If these steps don’t clear the blinking lights, the issue is likely a failed mainboard or a critical sensor failure that requires authorized service tools. If the printer remains unresponsive after a power cycle, stop troubleshooting to avoid further board corruption.
Frequently asked questions
Can I keep using the printer if the red light is blinking?
No, you shouldn’t keep using it because the blinking red light indicates a critical error that prevents safe operation. If the issue is a full ink pad, continuing to run the printer may cause ink to overflow inside the cabinet, which can damage the motherboard or leak onto your workspace. Always address the specific error code shown in your printer software before attempting any further print jobs.
Why do the red lights blink at the same time?
The simultaneous blinking of both the paper and ink lights usually signals a “fatal error” or a service life limit. This happens because the printer’s internal logic controller has detected a state that it can’t recover from without external intervention. You should check the printer status window on your computer to see the exact error message, as this will confirm if the printer needs a professional service reset.
Is it safe to reset the ink counter with software found online?
No, it isn’t safe to use third-party “resetter” tools found on forums or unofficial websites. These programs often contain malware that can infect your computer and may permanently corrupt the printer’s firmware. Using these tools also voids any remaining warranty and can cause the printer to ignore hardware safety limits, which might lead to physical damage or electrical shorts inside the machine.
How long does an ink pad replacement take?
The technician must open the casing, remove the saturated sponges, clean the internal area, and then use a proprietary utility to reset the internal usage counter. This isn’t a task you can do at home, as it requires specific disassembly procedures to avoid damaging the delicate ribbon cables inside.
What happens if I ignore the blinking lights?
If you ignore the lights, the printer will eventually lock itself completely and refuse to accept any print commands. In some cases, the mechanical parts may continue to try and move while an error is present, which can lead to broken gears or a burnt-out motor. Ignoring these warnings is a mistake that often turns a simple maintenance service into a much more expensive repair bill.
Does it matter if I use a USB hub?
Yes, it matters because USB hubs often provide insufficient power or unstable data signals for printer communication. This instability can cause firmware updates to fail or lead to random error lights during daily use. Always connect your printer directly to the computer’s built-in USB port using a high-quality cable to ensure the printer receives a steady, reliable connection at all times.
Final Thoughts
Once you’ve reset the counter, your printer should start working again smoothly. It’s a good idea to keep an eye on your ink levels and print quality moving forward. If you notice any strange noises or persistent errors later on, don’t hesitate to contact a professional technician for a thorough checkup.