Your Samsung TV red light blinking indicates a hardware fault or a power supply issue that requires immediate attention. You’re safe to continue using the device only if the light is steady or if the screen is still displaying an image.
However, if the screen remains black and the light pulses, stop all attempts to power it on immediately. Unplug the unit from the wall outlet to prevent potential electrical damage to internal components.
The most common mistake owners make is repeatedly cycling the power button in hopes of a reset. This often causes a surge that can fry the mainboard, turning a simple power supply repair into a total loss.
Never attempt to open the rear panel. High-voltage capacitors inside can hold a dangerous charge for a significant period after the power cord is disconnected. If you hear a faint clicking sound, the power supply is failing; if the light is solid, the issue is likely software-based.
Do this first
Unplug the power cable from the wall outlet and wait at least 60 seconds to allow the internal capacitors to discharge fully. This delay is vital to ensure the internal logic boards fully power down and reset.
Disconnect every external device from the TV, including HDMI cables, USB drives, and soundbars. A faulty HDMI cable often triggers a handshake error that mimics a hardware failure. If the TV boots normally after this step, reconnect your devices one by one to isolate the specific component causing the conflict.
Plug the TV power cord directly into a wall outlet, bypassing any surge protectors or power strips. Many users mistakenly assume their power strip is fine, but failing strips often provide insufficient current for a cold boot.
Press and hold the physical power button on the TV chassis for 15 seconds while the unit is still unplugged to discharge residual energy from the power supply capacitors.
Plug the TV back into the wall outlet and check if the blinking light stops.
Why is my Samsung TV red light blinking?
The blinking red light is a diagnostic code from the TV’s mainboard, signaling that it can’t complete the startup handshake with the power supply or the panel. When you press the power button, the mainboard sends a signal to the power supply unit to wake up the backlight and the processor. If the power supply fails to return a “ready” signal within a few milliseconds, or if the mainboard detects a short circuit in the panel, the system enters a protection mode. This safety mechanism prevents further electrical damage by cutting power to the internal components.
This behavior is most common when internal electrolytic capacitors on the power board age and bulge, preventing them from holding the necessary voltage to sustain the system. In other cases, the issue stems from a “panel short,” where the display screen itself has a physical defect that prevents the TV from booting. You can verify the status of your specific model by consulting the Samsung support troubleshooting guide for power issues.
If the light blinks a specific number of times in a loop, it’s often a manufacturer-specific code. However, most modern LED models use the blinking pattern simply as a general “no power” indicator. If you see a faint glow on the screen but no image, the issue is likely with the LED backlight strips rather than the power board. This distinction is vital; if the power board is the culprit, the unit will remain entirely unresponsive. If the screen has power but no backlight, you may be able to see a dim image using a flashlight held close to the glass.
Check these, cheapest first
Check the remote control
Ensure the remote isn’t sending a constant signal by removing its batteries. Sometimes a stuck button on the remote forces the TV into a reboot loop that looks like a blinking light error.
Inspect the power cord
Examine the power cord for any visible cuts, burns, or loose connections where it enters the TV. A damaged cord can cause intermittent power delivery, triggering the protection mode.
Test a different outlet
Plug a lamp or another device into the same outlet to confirm it provides steady power. If the outlet is loose or the wall voltage is unstable, the TV will fail to initialize its boot sequence.
Check HDMI cable status
Remove all HDMI cables to see if the TV boots to its internal menu without external input. A faulty HDMI device can send a “wake” signal that conflicts with the TV’s own startup command.
Review the power board
Look through the ventilation slots on the back of the TV for any sign of burning or unusual smells. If you see dark spots on the internal components, the power board has likely suffered a thermal failure.
The fix
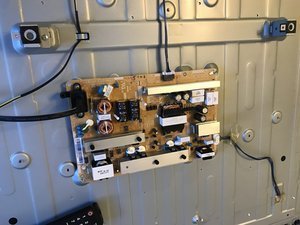
If the steps above don’t restore function, the most effective repair involves replacing the power supply board or the mainboard. Start by removing the rear casing, which usually requires a standard Phillips screwdriver. Once open, inspect the power board—the large board connected directly to the AC power cable—for capacitors with domed or leaking tops. If you find these, replacing the entire power board is the standard fix, as individual capacitor soldering requires high-level electronics experience.
When replacing boards, you must match the part number exactly to your specific TV model, as even one letter difference can cause incompatibility. Always verify the board’s revision number printed on the sticker; buying a board with a matching model number but a different revision often leads to inverted screen images or sound failure.
After swapping the board, ensure all ribbon cables are seated firmly in their locking clips. A successful repair is confirmed when the TV boots to the home screen without the red light pulsing. If the blinking returns within a week, the issue likely lies deeper within the panel’s T-Con board or the screen itself. In these cases, the cost of the replacement panel usually exceeds the value of the television, making the unit a total loss.
Where this stops being a DIY job
You must stop all self-repair efforts the moment you consider probing the power supply unit with a multimeter or attempting to solder components on the circuit boards. High-voltage capacitors inside a television store enough electricity to cause a severe shock even hours after being unplugged, posing a significant risk of injury or death.
Furthermore, opening the panel assembly risks cracking the glass, which is the most expensive part of the unit to replace. If you hear a faint clicking sound but the screen remains dark, don’t attempt to bypass internal fuses. This symptom often indicates a shorted backlight array, which requires specialized suction tools to disassemble without shattering the display.
If the TV remains unresponsive after basic power cycling, contact a licensed electronics technician or an authorized service center. A professional will first check the voltage output from the power board to the mainboard using specialized equipment to isolate whether the failure is a simple power supply issue or a catastrophic failure of the display panel.
Repairing a panel short often costs more than the current market value of the television. Always ask for a written quote before authorizing any major work. If the repair estimate exceeds 50% of the unit’s current retail value, it’s almost always more economical to purchase a new television.
Frequently asked questions
Can I reset my TV if it won’t turn on?
You can perform a power cycle by holding the power button on the TV chassis for 30 seconds while the unit is unplugged to drain residual energy from the capacitors. If the blinking persists, the problem is likely a hardware component failure rather than a software glitch, and a reset won’t solve the underlying electrical issue.
Is it safe to leave the TV plugged in?
It isn’t recommended to leave a TV with a blinking red light plugged in for long periods. Constant power cycling can stress the already failing components and potentially lead to heat buildup or further damage to the mainboard. Always unplug the device until you have time to diagnose the issue or have it serviced by a professional technician.
How long does a TV power board last?
Most power boards function for a limited period, depending on the ambient heat and how many hours the TV is used daily. Factors like poor ventilation, dust buildup, and frequent power surges can significantly shorten this lifespan. If your TV is aging, consider the cost of professional repair against the price of a modern replacement.
What happens if I ignore the blinking light?
Ignoring the light often leads to a complete failure where the TV will no longer show any signs of life. Continued attempts to power on a unit with a failing power board can also damage the mainboard or other connected components. It’s better to address the issue early before the power board failure cascades into a more expensive repair.
Does the blinking pattern mean something specific?
The blinking pattern doesn’t always correspond to a specific error code for the consumer. While some service manuals list specific counts for certain internal errors, most Samsung televisions use the blinking light as a universal indicator that the power-on self-test has failed. You should rely on the hardware inspection steps rather than trying to decode the light pattern yourself.
Is the repair worth the cost?
The repair is usually worth it if the failure is limited to the power supply board, which is often an affordable part. However, if the issue is with the display panel itself, the cost of the screen replacement usually exceeds the price of buying a new television. Always get a professional estimate to determine if the repair is economically viable for your specific model.
Final Thoughts
If these quick fixes don’t restore your picture, it’s time to reach out to a professional technician. Don’t worry if you can’t solve it yourself; there’s likely a deeper internal component that needs replacing. Contacting Samsung’s official support team will help you decide if a repair is worth the cost.
Related guides