A low battery or a simple software glitch is the reason your joy con not syncing with your Nintendo console. Most of the time, the controllers just need to be docked directly to the console rails to re-establish their wireless handshake. If they don’t wake up after a full charge, a quick reset of the communication protocol usually fixes the signal drop. You should check the official Nintendo support troubleshooting guide to verify your current hardware status if these basic steps fail.
The causes, most likely first
| Cause | How common | How to confirm it | Fix it yourself? |
|---|---|---|---|
| Dead battery | Most common | No lights on controller | Yes |
| Software glitch | Very common | Console won’t pair | Yes |
| Signal interference | Somewhat common | Laggy or dropouts | Yes |
| Damaged rail | Rare | Visible bent pins | No |
| Internal fault | Very rare | No response at all | No |
| System update | Rare | Error code appears | Yes |
If your controller shows no lights, plug it into a verified wall outlet for 30 minutes. Don’t use a USB hub, as these often fail to provide the necessary amperage to trigger a charge cycle.
When the device pairs but suffers from stuttering, check for competing signals. Bluetooth speakers or Wi-Fi routers placed within three feet of the console frequently cause packet loss. If the lag persists after moving these devices, you’re likely dealing with a hardware failure rather than interference.
For software glitches, perform a hard reset by holding the power button for ten seconds. If you see bent pins on the rail, stop immediately. Attempting to force a connection causes permanent damage to the console’s port, which costs significantly more to repair than a simple controller replacement.
Power and battery depletion issues
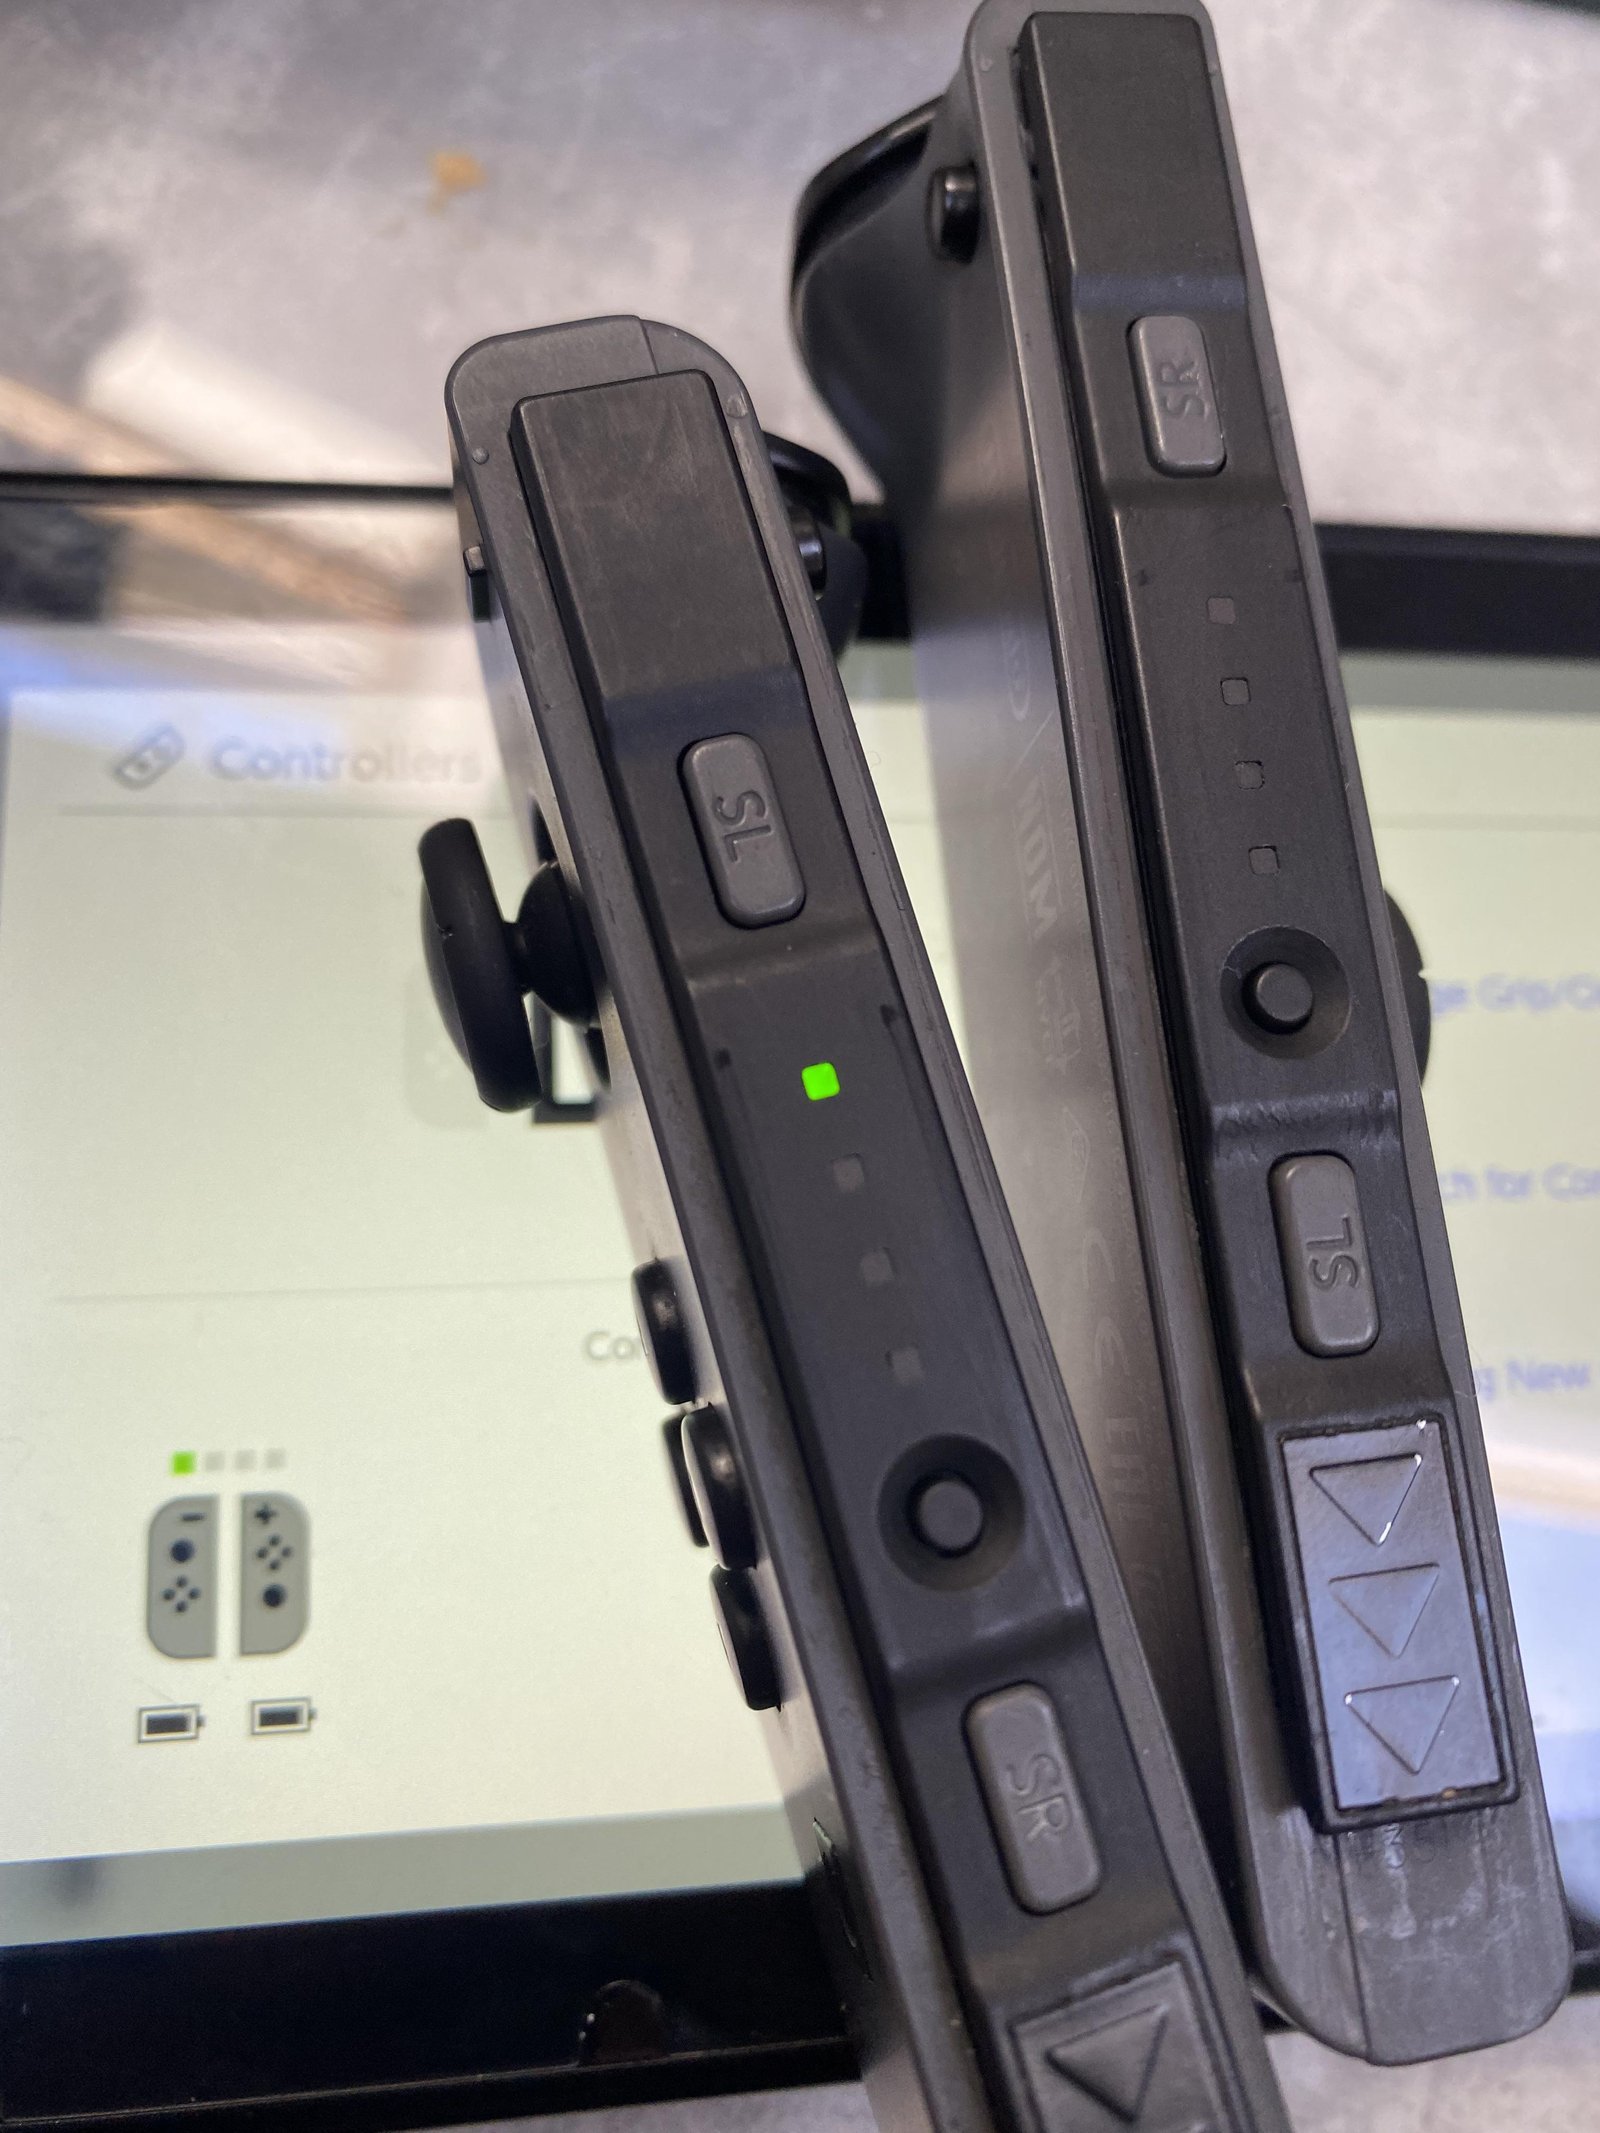
A controller that has sat unused for several weeks often loses its charge completely, which prevents it from broadcasting a signal to the console. You can confirm this by sliding the controller onto the side of the console while it’s plugged into the wall outlet.
Leave the controllers attached to the console for at least 3.5 hours to reach a full charge from empty. If you notice that one controller charges while the other does not, the issue is likely a dirty contact point on the bottom of the rail. You can gently clean these gold pins with a soft, dry toothbrush to remove dust or debris. Don’t use any liquid cleaners or metal tools, as these can scratch the pins and cause permanent damage. If the controller still refuses to hold a charge after a full night on the dock, the internal battery might have reached the end of its cycle life. This repair isn’t a do-it-yourself job if the casing needs to be opened, as lithium batteries require careful handling to avoid fire risks.
Wireless pairing communication errors
A temporary software conflict often prevents the console from recognizing the wireless signal even when the battery is full. This happens when the internal pairing table on the console becomes corrupted, causing it to ignore the controller’s handshake request. You can tell if this is the issue because the controller lights will blink rapidly, but the console menu shows no sign of a new device.
To fix this, go to the System Settings menu on your console and select Controllers and Sensors. Choose the option to Disconnect Controllers, which clears all saved wireless profiles from the system memory. Once you have cleared the list, attach both controllers to the console physically. This forces the system to re-register the unique hardware ID of each device. If you have multiple sets of controllers, ensure you only have the ones you’re currently using attached to the system to avoid signal overlap. This process takes about 2 minutes and resolves most connection loops. If you find that the controllers work perfectly while attached but disconnect immediately upon removal, the internal wireless antenna may have a loose ribbon cable. This is a common mistake people make when they drop their console, as the internal components are sensitive to impact. If the controllers still fail to pair wirelessly after a reset, you may need to contact Nintendo support for an inspection of the internal Bluetooth module.
External signal interference patterns
Physical barriers and electronic noise often block the Bluetooth signal between your controller and the console. This occurs if your console is hidden inside a metal cabinet, behind a large television, or near other high-frequency devices like routers or cordless phones. You can confirm this is the problem if the controller works fine when sitting within 3 feet of the console but fails when you move to the couch.
If X is a crowded wireless environment, move your console to an open shelf at least 2 feet away from other electronics. If Y is a metal enclosure, take the console out and test it in the open air to see if the signal improves. The trade-off here is between the aesthetic of a hidden console and the reliability of your wireless connection. One mistake people often make is placing the console inside a drawer or behind a glass door, which creates a Faraday cage effect that weakens the Bluetooth broadcast. This costs you time in troubleshooting and can lead to frustration during gameplay. Keep in mind that placement requirements are consistent across all Nintendo Switch models. If you have tried moving the console and the controller still drops out, the issue is likely a failing internal Bluetooth chip rather than external interference. In this case, you’ll need a professional technician to evaluate the mainboard, as this isn’t a part you can replace at home without specialized soldering equipment.
The less likely causes
- Bent rail pins: Inspect the metal tracks on the side of the console; if you see bent or pushed-in pins, this requires a professional repair service.
- Firmware mismatch: If your console recently updated but your controllers did not, go to System Settings and select Update Controllers to manually push the new software.
- Corroded charging contacts: If you see green or white oxidation on the pins, it indicates liquid damage, which usually means the entire rail assembly needs replacement.
- System memory corruption: A system error can occasionally stall the pairing process, which is resolved by holding the power button for 12 seconds to perform a hard reboot.
What a fix usually involves
Fixing a syncing issue typically involves either a software reset or a mechanical cleaning. A software reset is free and takes only a few minutes of your time using the menu settings provided on the console interface. If the issue is a dirty rail, you only need a dry, soft-bristled brush, which is a low-cost item found in most households.
However, if the fix requires replacing a rail or an internal battery, you’ll need to purchase a replacement part. These parts are generally a small fraction of the price of a new controller, but they require a steady hand and specific screwdrivers to install. If you aren’t comfortable opening your hardware, you’ll need to pay for a professional repair service. The cost of such a service depends on the labor rates in your area and whether the device is still under the manufacturer’s warranty. You can check your warranty status by entering your console serial number on the official support website. Always get a written quote before agreeing to a repair to ensure you understand the full cost of the labor and parts involved.
Frequently asked questions
How to fix a Joy Con not syncing
Yes, you can fix most pairing issues by docking the controller directly to the console rail or by clearing the stored controller data in the System Settings menu. These two steps resolve the majority of communication errors. If these steps don’t result in a solid light on the controller, the issue might be a hardware failure that requires professional inspection or a replacement component.
How long does it take for joy cons to charge?
About 3.5 hours is required to fully charge a pair of controllers from a completely empty state. This assumes you’re using a standard console dock that’s connected to a wall power source. If you’re charging from a portable power bank, the charge time might be longer depending on the power output of the battery pack you’re using.
Is it safe to clean the controller pins?
Yes, it’s safe to clean the charging pins as long as you use a dry, soft toothbrush and perform the action while the console is powered off. Never use water, alcohol, or metallic objects, as these can cause short circuits or permanent damage to the delicate contact points. Always ensure the pins are completely dry and free of debris before reattaching the controller.
What happens if I drop my console?
A drop can cause internal ribbon cables to loosen or the metal rails to bend, which directly impacts the ability of the controller to sync. If you notice the controller fits loosely or the connection is intermittent after an impact, inspect the rail for physical damage. If the pins look fine but the connection remains broken, the internal antenna or Bluetooth module may have been damaged.
Does it matter which controller I use?
Yes, the console treats each controller as a unique device that must be registered to the system memory. If you’re using a controller from a different console, you must perform the pairing process by docking it to the new system. Once registered, the controller will remember that console until it’s paired to a different one or the connection data is cleared.
Why do my controllers disconnect during play?
About 2 feet of distance from other electronic devices is the minimum recommended space to prevent signal interference. If your console is crowded by routers, speakers, or large metal objects, the Bluetooth signal will struggle to maintain a consistent connection. Moving your console to an open location often eliminates these frequent dropouts and improves your overall gameplay experience.
Final Thoughts
If your controllers still aren’t responding after trying these fixes, don’t lose heart. You shouldn’t hesitate to reach out to Nintendo’s customer service team for further help. They’ve seen every technical glitch imaginable, and they’ll be happy to guide you through a repair or replacement process to get you gaming again.
Related guides