A joycon light not working usually happens because of a depleted battery or a failed sync connection with your console. If the green player indicator lights remain dark while the controller is otherwise functional, it’s often a simple software synchronization issue or a physical power delivery fault. When the device fails to show any life at all, it’s likely a depleted battery or a damaged rail connection.
Why the joycon light isn’t working
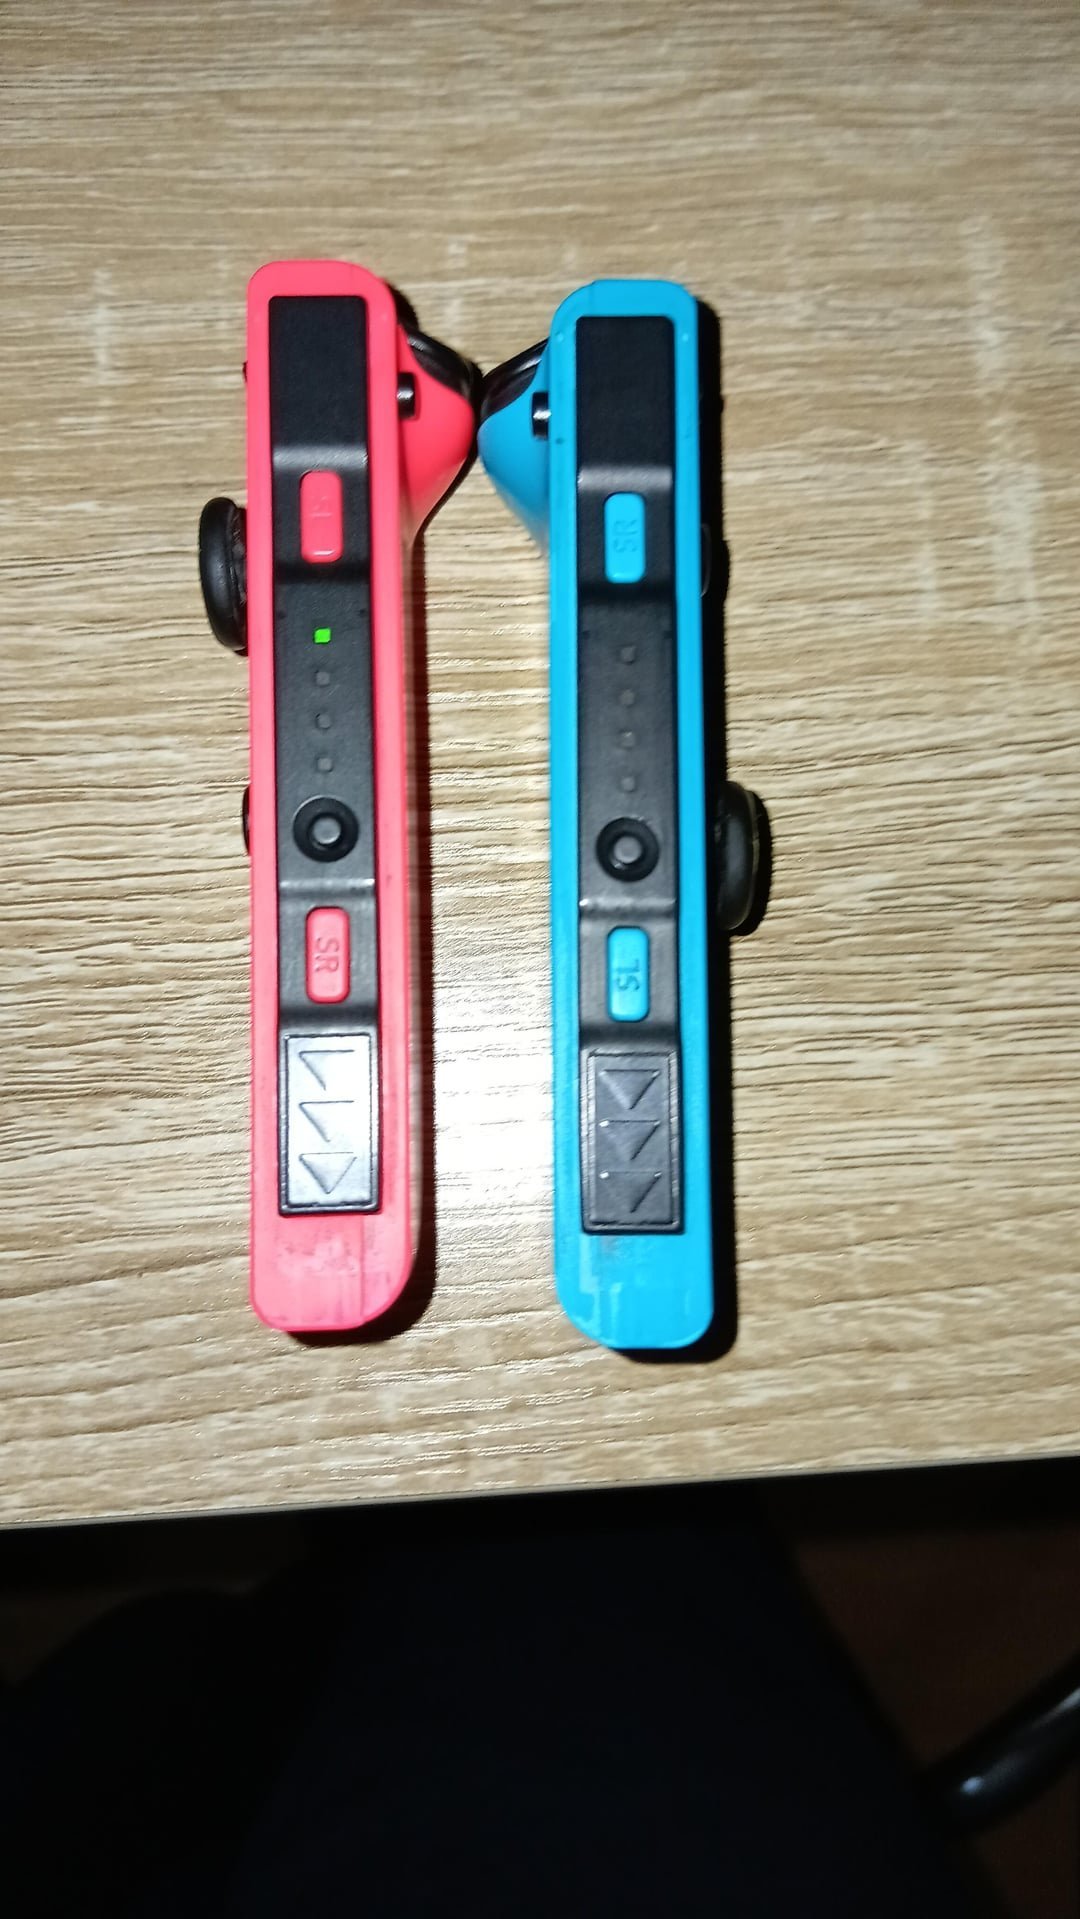
The most frequent reason for dark indicator lights is a communication error between the Joy-Con and the Nintendo Switch. When the console “forgets” the pairing status, the light sequence stays off because the controller isn’t assigned to a specific player slot. You can often clear this by performing a hard reset on the connection.
Another common cause involves the power rails on the side of the console. These metal tracks transfer both power and data. If the pins are dirty, oxidized, or physically bent, the controller can’t pull a charge or send a signal to the system. This prevents the indicator lights from illuminating because the controller does not “know” it has been docked.
Finally, a completely drained battery will cause the lights to stay off indefinitely. If the controller has been left unused for months, the battery may have entered a deep discharge state. In this condition, the controller requires a long, uninterrupted charge cycle to reach the minimum voltage threshold required for operation. Always check the official Nintendo support troubleshooting guide if your controller remains unresponsive after these standard steps. Note that this varies by model; some third-party controllers use different light signaling protocols than the standard Nintendo hardware.
Reset the wireless connection
This fix is for controllers that seem to work in the game but don’t show the player light, or for those that refuse to sync at all. You need to force the Switch to drop the current connection and start a fresh handshake.
First, go to the System Settings on your home screen. Scroll down to “Controllers and Sensors” and select “Disconnect Controllers.” Follow the on-screen prompts to clear all current pairings. Once the list is empty, attach the Joy-Con directly to the side of the console while it’s powered on. Wait for the click and look for a small animation on the screen. If the console recognizes the rail connection, the player light should flicker and then stay solid.
If you’re using the controller wirelessly, press the tiny circular sync button located on the flat rail of the Joy-Con. Hold it for one second, then release. If the lights don’t flash in a wave pattern, the controller is either dead or the internal light module has failed. If the lights flash but don’t stop, the console isn’t receiving the signal. This is a trade-off: you lose your current custom button mapping when you clear the controllers, but it’s the fastest way to resolve a software-based light error. This isn’t for controllers that have been dropped in water or show physical cracks on the rail, as these require professional inspection.
Clean the rail pins
This fix is for controllers that don’t charge or light up when attached to the console. The metal pins on the Joy-Con rail are delicate, and even a small amount of dust or skin oil can block the electrical connection.
You’ll need a clean, dry cotton swab and a tiny amount of high-percentage isopropyl alcohol. Don’t use water or household cleaners, as these will corrode the metal contacts. Power off the console completely before you start. Gently wipe the metal pins on the bottom of the Joy-Con rail and the corresponding pins on the side of the Switch console. Use a very light touch; if you press too hard, you might bend the pins, which makes the problem permanent.
After cleaning, let the parts air dry for at least five minutes. Slide the controller back onto the rail firmly. If the lights come on, the issue was simple debris. If they remain off, check the other side of the console. If the controller works on the left side but not the right, the problem is your console rail, not the controller. This is a common mistake; people often assume the controller is broken when the fault is actually the console’s internal rail connector. If the pins look bent or black, stop immediately and contact a professional repair service. Attempting to straighten pins without specialized tools usually leads to snapped contacts and a voided warranty.
Test the battery health
This fix is for controllers that have been sitting in a drawer for a long time. Lithium-ion batteries have a self-discharge rate, and if they drop below a critical voltage, they won’t show any lights, even when docked.
Plug your Nintendo Switch into the official power adapter and attach the Joy-Con to the side. Leave it undisturbed for at least four hours. Don’t try to play with it or check it every ten minutes. The system needs to stay in a steady state to trickle-charge a dead battery. If the light doesn’t appear after four hours, try charging it overnight.
This is worth the effort if you haven’t used the console in a long time. However, if you have been using the controller daily and it suddenly stopped showing lights, it isn’t worth your time to keep charging it. In that case, the internal battery has likely reached the end of its life cycle and won’t hold a charge. This isn’t a user-serviceable part. Replacing an internal battery requires opening the housing, which involves tiny screws and delicate ribbon cables. If you aren’t experienced with small electronics, don’t attempt this. You risk tearing the ribbon cables or causing a short circuit. If the battery is dead, the most cost-effective path is to have a professional replace the cell or consider a replacement controller.
What not to do
- Don’t use a needle or metal tool to scrape the pins inside the rail, as this will scratch the gold plating and cause permanent corrosion.
- Don’t spray compressed air directly into the rail, as the force can push dust deeper into the internal mechanism or dislodge the delicate spring-loaded pins.
- Don’t try to “jump start” the controller with a different power source or a phone charger, as the voltage will likely fry the internal charging chip.
- Don’t leave the controller attached to a non-official charging grip for days, as some third-party grips don’t regulate the charge correctly for dead batteries.
How to stop it happening again
To keep your controllers in good condition, prioritize a clean storage environment and consistent charging habits.
| If you’re doing this | Do this instead | Why |
|---|---|---|
| Leaving them in a bag | Use a hard-shell case | Prevents pin damage |
| Cleaning with water | Use dry cotton swabs | Prevents short circuits |
| Forcing them on rails | Slide them gently | Protects the rail pins |
Most users fail by leaving controllers in high-humidity areas like basements. Moisture corrodes the internal contact points, leading to ghost inputs that no software update can fix. If your controller feels sticky or unresponsive, check the rail pins for oxidation. If you see white or green residue, use 90% isopropyl alcohol on a swab to gently clean the surface. If you see bent metal, stop immediately to avoid permanent board damage. Always store them in a cool, dry drawer away from direct sunlight. This simple change prevents the plastic casing from warping over time.
Frequently asked questions
Can I fix the light if the controller still works?
You can fix indicator lights by clearing controller pairings in system settings and re-syncing the device. This resets the handshake between the console and controller to restore LED status. If lights remain dark after a full system reset, the LED module may have failed.
Why are my lights flashing but not connecting?
Flashing lights indicate the controller is in discovery mode searching for a console signal. This occurs when the wireless radio struggles to establish a stable connection or faces interference from nearby devices. If they flash indefinitely, the internal Bluetooth antenna may be faulty.
How long should I charge a dead Joy-Con?
Charge a dead controller for at least four hours while attached to a powered-on console. If the battery was drained for months, it may require six hours to reach the voltage needed to power the internal components. If it shows no life after six hours, the battery is likely dead.
Is it safe to use a third-party charger?
You shouldn’t use unverified third-party chargers for your Joy-Con. Using an official Nintendo power adapter ensures the voltage is regulated correctly, protecting the controller’s sensitive charging circuitry. Cheap chargers often lack safety protocols, which can lead to overheating or permanent battery damage.
What happens if the rail pins are bent?
Bent rail pins prevent the controller from charging or communicating with the console. This is a physical hardware fault that can’t be fixed through software settings. Because the pins are extremely fragile, this damage requires professional repair services to replace the rail assembly.
Final Thoughts
If these quick fixes don’t get your controller glowing again, don’t worry. It’s likely a minor hardware issue that needs a professional touch. You should reach out to Nintendo’s support team to see if your device is still under warranty. They’ll help you get back to your games in no time.