
You fix a keurig slim descaling light blinking by running a full descaling cycle with a mixture of white vinegar or a descaling solution and water. This light stays on because the machine’s internal sensors detect mineral buildup that slows down the heating element and water flow. If you don’t perform this maintenance, the machine will eventually stop brewing or suffer permanent damage to its pump. This process is essential for every user who wants to maintain consistent water temperature and flow speed.
Supplies for descaling your Keurig Slim
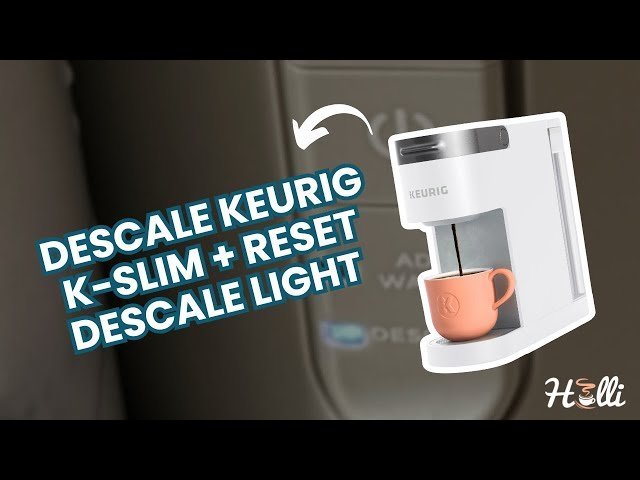
Descaling Solution or White Vinegar: You need 14 ounces of Keurig Descaling Solution or a mixture of 7 ounces of white distilled vinegar and 7 ounces of fresh water. If you choose vinegar, run two extra cycles of plain water afterward to ensure no lingering acidic odor affects your next cup of coffee.
Large Ceramic Mug: Use a mug that holds at least 12 ounces to catch the hot liquid without splashing.
Fresh Water: Have a pitcher of filtered water ready for the rinsing stages.
Sink: You need a nearby sink to empty the mug and refill the reservoir repeatedly.
Clean Cloth: Keep a dry cloth nearby to wipe down the machine exterior if liquid drips.
User Manual: Check the Keurig official support page to confirm specific model requirements. Different K-Slim versions have varied sensor reset steps; failing to follow your specific model’s sequence often causes the “Descale” light to remain illuminated even after the cleaning is complete.
You can substitute vinegar for commercial solution, but never use dish soap or bleach. These chemicals leave a permanent, toxic residue inside the internal plumbing.
Step-by-step
- Empty the machine. Remove any K-Cup pod from the holder and empty the water reservoir completely.
- Add the solution. Pour 7 ounces of white vinegar and 7 ounces of fresh water into the reservoir. If you’re using a commercial descaling solution, follow the bottle instructions for the exact ratio, which is usually half solution and half water.
- Position the mug. Place your large ceramic mug on the drip tray directly under the brew head.
- Initiate the cycle. Press the brew button to start a brew cycle. When the liquid dispenses, pour it from the mug into the sink. Don’t drink this mixture.
- Repeat the process. Continue brewing until the “Add Water” light turns on, indicating the reservoir is empty. Let the machine sit for 30 minutes. This rest period allows the acid to break down the hard water deposits inside the heater.
- Rinse the reservoir. Wash the reservoir thoroughly with warm water to remove all traces of vinegar or solution.
- Run freshwater cycles. Fill the reservoir to the “Max” line with fresh, plain water. Run continuous brew cycles until the reservoir is empty to flush the internal tubes.
- Reset the light. If the light remains blinking after the final rinse, turn the machine off, unplug it for 60 seconds, and then plug it back in.
Careful: Never leave the machine unattended while the descaling liquid is hot, as the steam can cause burns. Tip: If the light persists after a full rinse, the sensor may be faulty; contact the manufacturer directly for warranty support.
Factors affecting the process
The time and effort required to clear the light depend heavily on the hardness of your local water supply. High mineral content forces more frequent cleaning to keep the internal pipes clear.
| Water Condition | Required Frequency | Expected Time | Things to Watch |
|---|---|---|---|
| Soft Water | Every 6 months | 45 minutes | Flow speed |
| Hard Water | Every 3 months | 60 minutes | Noise levels |
| Well Water | Every 2 months | 75 minutes | Scale buildup |
You can determine your water hardness by checking your local utility’s annual water quality report for grains per gallon (GPG). If your reading exceeds 7 GPG, you fall into the hard water category.
A common mistake is using undiluted vinegar, which can degrade rubber gaskets over time. If you notice a persistent chemical smell after rinsing, you likely have residual buildup trapped in the seals. In this case, perform two additional fresh water cycles to clear the lines.
Always prioritize the rinse phase. If the output still tastes acidic, don’t skip the final flush. Adding an extra rinse cycle adds only ten minutes but prevents the metallic aftertaste that ruins the next batch.
How to tell you did it right
A successful descale results in a machine that runs quietly and dispenses water at a steady, consistent speed. When the process is done correctly, the blinking light will turn off after the final rinse and a power reset.
If the light stays on or the coffee tastes sour, mineral deposits remain or vinegar is still trapped in the heating chamber. This usually happens when the rinsing phase is cut short. To prevent this, always run at least three full reservoirs of fresh water through the machine after the descaling solution is gone.
A common mistake is rushing the final rinse. If you smell vinegar in the steam, you haven’t flushed enough water. Run two additional cycles immediately.
If the machine makes a loud grinding noise or no water flows at all, the blockage is too severe for a home descale. At this point, the machine requires professional service or replacement, as internal pumps aren’t user-serviceable parts. If the pump runs but produces no output, check the intake valve for a trapped air bubble before seeking repairs.
Proper care and maintenance
The primary rule for long-term machine health is to follow the manufacturer’s descaling schedule, which typically triggers every three to six months depending on usage. If your machine sees more than four cups of daily use, perform this cycle monthly to prevent mineral buildup from choking the internal heating element.
Once the cycle is finished, always wipe the needle and the exit path with a damp cloth to remove any loose debris that may have dislodged during the cleaning. Keep the reservoir lid closed when not in use to prevent dust from entering the water supply.
If you live in an area with hard water, defined as having more than 120 milligrams of calcium carbonate per liter, use a charcoal filter to slow scale accumulation. These filters must be replaced regularly to remain effective.
If you notice the machine leaking, stop using it immediately and unplug it; electrical components near water pose a severe shock risk. For any mechanical failure, contact the manufacturer’s support line or a licensed appliance repair technician. Attempting a DIY fix on internal seals often voids your warranty, turning a minor repair into a total loss. Always check your serial number before calling to expedite the service process.
Other ways to do it
Using commercial kits
You can buy pre-mixed descaling solutions from the manufacturer. These are formulated to be gentler on the internal rubber seals than vinegar. While the cost is higher, the process is identical in time and effort.
Professional cleaning services
Some local appliance repair shops offer deep cleaning services for coffee machines. This is a good choice if your machine is heavily clogged, but it costs significantly more than doing the work at home. Opt for this if you notice a burnt taste that persists after two manual descale cycles. It’s often less than a new unit.
Monthly maintenance habits
Instead of waiting for the light, you can run a small amount of vinegar through the system as part of your usual clean. This prevents the “blinking” state from ever occurring, keeping your brew quality high. If you live in an area with hard water, perform this flush whenever you notice it to prevent mineral buildup.
Frequently asked questions
Can I use lemon juice instead of vinegar?
Stick to white vinegar or a dedicated descaling solution to ensure the machine remains clean and functional. Using organic acids can leave a residue that’s difficult to rinse out, which will negatively impact the flavor of your future cups of coffee.
Keurig Slim Descaling Light Blinking After Cleaning
The light often stays on because the sensor hasn’t registered the change in water flow or the reset sequence was interrupted. Turn the machine off, unplug it for one minute, and then plug it back in to force the sensor to re-check the system. If it still blinks, ensure the water reservoir is seated correctly and filled to the maximum line.
Is it safe to drink the coffee if the light is blinking?
Yes, the coffee is safe to drink, but the machine is likely operating at a lower efficiency due to scale buildup. The water may be cooler than it should be, and the brew volume might be inconsistent. It’s better to descale the machine as soon as possible to avoid long-term damage to the heating element.
How long does the descaling process take?
The entire process takes between 45 and 75 minutes, depending on how many rinse cycles you need to clear the vinegar taste. The active part where you interact with the machine takes about 15 minutes, while the rest is waiting for the solution to soak and running the water through the system. Always plan for at least an hour to ensure you have enough time to finish the rinsing properly.
What happens if I ignore the blinking light?
If you ignore the light, the mineral scale will eventually block the internal tubes completely, leading to a “No Water” error or a total pump failure. Once the scale hardens, a standard descaling solution may no longer be strong enough to dissolve it. This will force you to seek professional repair or buy a new coffee maker, which is much more expensive than regular maintenance.
Final Thoughts
Once the light turns off, you’ll enjoy a fresh, hot cup of coffee again. It’s a good idea to mark your calendar for three months from today so you don’t forget your next cleaning. Keeping up with this simple routine ensures your machine stays in great shape for years to come.